 |
||||
|
||||
The nice thing about the quilted rag bags is that you can make them any size you want them. You can make a smaller version for putting in the guest bathroom for extra wash cloths or for using them as gift bags.
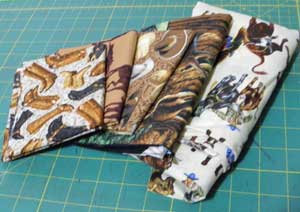
I selected this material so that all four sides would be different but you can use the same material for all four sides.
To make the quilted rag bags you will need

- Material for the four sides and the bottom and handle
- Material for the lining
- Batting
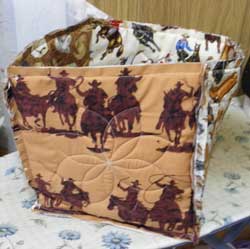
Make a sandwich out of each main color, batting and lining. Quilt each square anyway you like. It can be very simple or more detailed. I just quilted this one with a flower motif.
To make the handle you can either piece the material or make it a solid color. I made this handle 22 inches long by 3 inches wide. You will need two pieces the same size. You will also need a piece of batting 1/2 inch narrower. Turn both pieces of the material so that the right sides face and sew down one side. Lay the piece down with the wrong side facing you and lay the piece of batting on one side and then fold the other side over it. I fold the material over the batting and ten fold the top piece to match and sew it down about 1/4 inch and then I top stitch the other side.
Sew the sides together using a 1/2" seam. Leave one side open. Now sew the bottom to the sides with a 1/2" seam. Sew all four sides to the bottom and then sew the other side seam that you left open. Remember that you want your seams on the outside of the bag.
I find it easier if you snip the seams now before you fold over the top.
 Clip all around about 1/4" to 1/2" apart but be sure that you don't cut your seam.
Sew the sides together using a 1/2" seam. Leave one side open. Now sew the bottom to the sides with a 1/2" seam. Sew all four sides to the bottom and then sew the other side seam that you left open. Remember that you want your seams on the outside of the bag.
I find it easier if you snip the seams now before you fold over the top. I snip the seams about every 1/4" to 1/2" apart. Clip all the way around the sides, bottom and top.
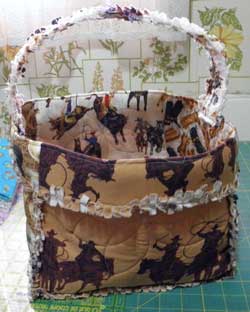
Now fold over the top as far as you want. I folded this one over 2 1/2". Attach the handle to the sides with a pin and then top stitch all the way around the top. This stitch secures the handle on the bag.
Now wash the rag bag and toss it in the dryer. They are just like a rag quilt. They get better each time they are washed.

Craft Ideas
I'd love to hear from you. If you have any questions or arts and craft tips that you would like to share please contact me and I will share them with everyone else.
Blick Art Materials-You can find all kinds of art and craft supplies here that you can't find anywhere else.
Purchase scrapbooking supplies from the Scrapbook.com Superstore!
MisterArt.com Discount Art & Craft Supplies--Up to 75% off!
MisterArt.com offers a huge selection of discount art supplies and craft supplies
Create More, Spend Less at www.CreateForLess.com
Copyright 2007.
Return to top
 This quilted rag bag was made for my daughter's Easter basket. I get her a basket every year that finally gets thrown away so this year I decided to make her one that she can use all year long.